nuxBot has various confirming indicators that can be used to improve your strategy.
For example: Only allow buys when RSI is below 30 or allow sells only when RSI is above 70.
Currently there are:
and more will be added upon request without hesitation.
How do I enable confirming indicators?
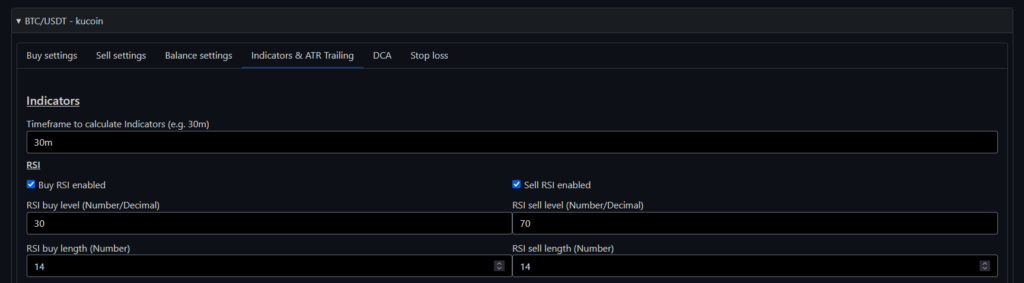
To enable the confirmation indicators via the web interface, you need to click on your desired pair under the “Trading Settings” and then click on the “Indicators & ATR Trailing” tab.
First you have to choose the timeframe with which the indicators will be calculated.

Then you can activate the indicator under your desired indicator (Buy/Sell … enabled) and select your desired Buy level (… buy/sell level). In addition, you can select the length/candles used (… buy/sell length) for the calculation of the indicator.
Example with RSI as buy and sell indicator:
Indicator settings:
- Buy … enabled: Enable or disable … for buying.
- Sell … enabled: Enable or disable … for selling.
- … buy level (Number/Decimal): The … level to enable buy at.
- … sell level (Number/Decimal): The … level to enable sell at.
- … buy length (Number): The length (candles used) for the … buy calculation.
- … sell length (Number): The length (candles used) for the … sell calculation.
If you need more help, feel free to write to our support via our contact page. 🙂


